In this example I will upgrading from ESXi 6.0 Update 2 to ESXi Update 3 on a standalone host.
1) Check current version:
esxcli system version get
Output:
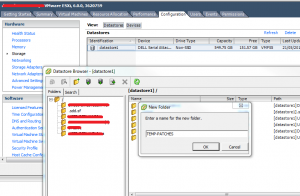
2) Download the required file from VMware then upload zip file to temporary directory on the ESXi host. In this case I have created a directory called TEMP-PATCHES/ and uploaded the file via the traditional client.
3) Put host in maintenance mode (Shut down VMs beforehand)
I normally do this via the client put the following command will also work:
vim-cmd hostsvc/maintenance_mode_enter
4) Check repository:
esxcli software sources profile list --depot=/vmfs/volumes/datastore1/TEMP-PATCHES/update-from-esxi6.0-6.0_update03.zip
Output:
5) Dry run the install:
esxcli software profile update --depot=/vmfs/volumes/datastore1/TEMP-PATCHES/update-from-esxi6.0-6.0_update03.zip --dry-run --profile=ESXi-6-XXXXXXX-standard
Output:
6) Update the host:
esxcli software profile update --depot=/vmfs/volumes/datastore1/TEMP-PATCHES/update-from-esxi6.0-6.0_update03.zip --profile=ESXi-6.0.0-20170202001-standard
Output:
7) Reboot the host:
reboot
8) Check the new version:
esxcli system version get
Ouput:
10) Take out of maintenance mode (if SSH isnt stopped and started with host then you will have to use the client):
vim-cmd hostsvc/maintenance_mode_exit
11) Start VMs


You must be logged in to post a comment.